Check out our Guide to St. George, to help plan you stay!
Read moreTravel Guide to St. George, Utah
How to Stay Warm in the Backcountry
Here is my comprehensive guide on how to stay warm when backcountry skiing or skinning up at the resort.
Stay Warm Before Starting: Warm up before leaving the car. Drink warm liquids on your way to the mountains, and make sure you’re warm (but not sweaty) before heading out.
Avoid Sweating: Pay attention to the first sign of overheating—often a prickling sensation on your skin. Stop, shed a layer, and stay ahead of it. If you’re with friends, don’t hesitate to ask for a quick break. If your clothes get sweaty, the rest of your day can be miserable or even dangerous due to hypothermia.
Layering is key to staying safe while backcountry skiing and it depends on several factors: how cold it is, how fast you’re going, and whether you tend to run hot or cold. Staying warm and dry is all about managing your layers and being proactive about your body temperature.
Base Layer
Always start with a high-performance wicking base layer. Not all wicking fabrics are created equal—I personally find that my Patagonia capilene, and Brynje wool base layers perform much better than my Lululemon and Athleta tops. (And the Brynje layer can also double as your disco dancing top, ha!) Kari Traa is another popular base layer that is high qulaity and always has cute prints.
Mid Layers
For the Top: A thicker fleece works well. I typically wear the Black Diamond coefficient hoodie because it doesn’t have pockets at the waist. It makes it really smooth for layering.
For the Bottom: If I’m moving fast, I wear just a wicking layer and shell pants. If I’ll be standing around more, I wear shell bibs add puffy pants for extra insulation. Just note that puffy layers don’t typically breathe very well, so you will sweat if you are moving quickly. And as I mentioned before, sweating is something you really want to avoid when possible!
Outer Layers
A packable puffy jacket is essential for really cold days. I’ve chosen the Patagonia Down Sweater because it does not have a hood and it packs up really small.
For my last layer, I use a breathable, stretchy, water resistant shell that has skin pockets. You have to balance waterproof/breathability/stretch and finding the right balance isn’t easy! The coat that I’ll buy next season will most likely be this Dynafit coat which also has skin pockets.
Feet
I have a secret for cold days, and it has changed everything for me. I wear heated socks anytime the temperature is below 20 degrees OR when I know I am going to be standing around more than I am moving. Heated socks are a total game-changer and I've never regretted the money I spent on them. If you aren't ready to make that investment, I recommend a tall, thin wool sock. I wear one similar to this on days above 20 degrees. Do your best to start with warm and dry feet.
Hands
Your hands sweat just like your core, so layering is essential. I like to wear a wicking glove liner as my base layer. Be sure you get one with a low profile cuff so it doesn’t interfere with the cuff of the over-mitt. My favorite setup is what I call my "sleeping bag gloves"—I add a charcoal hand warmer in the finger compartment for extra warmth. When I need more dexterity, I peel back the liner while still keeping my hands warm. It is a genius system and my fingers haven’t cold since I started using it.
Neck & Head
If all your layers have hoods, your neck can feel restricted. I recommend one insulating layer to have a hood and a shell with a hood (that fits over a helmet) for the right balance. You don't want all 4 layers to have hoods.
A neck gaiter is a simple but effective way to regulate temperature. I wear mine high under my helmet when it’s cold and pull it down for airflow when I warm up. It’s an easy layer to adjust without having to remove other clothing.
Other tips:
Put your skins on your skis at home.
2. Drive to the hill with your left ski boot on.
3. Be wearing exactly what you plan to wear going up the mountain, and then put your biggest puffy coat on top of all of it to drive.
4. Minimize the time you spend between parking and staring to ski. The moment you step out of your car, the clock starts ticking and your body temperature starts to drop.
5. Have your backpack ready to go with another puffy coat packed inside of it.
So the only things you need to do outside of the car is put on your right boot, peel off your extra puffy jacket, then grab your backpack and skis and get moving! The time between putting you car in PARK and skiing should be less than 10 minutes, ideally more like 3-4 minutes.
Travel Guide to Park City, Utah
Check out our Guide to Park City, to help you plan your stay.
Read moreMountain Bike Terrain Types
Learn about the differences in mountain biking terrain and trails!
Read moreTrail Building
Learn more about trail building in Utah!
Read moreSpring Mountain Biking Tips
Here are some spring mountain biking tips and a list of Utah Trail Associations, where you can find up-to-date trail conditions.
Read moreLeave No Trace
Don’t be someone who disrespects the trials they ride on. Learn how to leave no trace!
Read moreOur Favorite Trails in Moab
It’s hard to believe, but spring is on the horizon. While many trails in the intermountain west will be covered in snow for several more months, we encourage you to take a road trip south if you’re itching to get in the saddle before then. As you know, we absolutely LOVE desert riding in the cooler months — especially in the red-rock desert. Our spring clinics are held in St. George, Utah, but there are many other red-rock mountain biking destinations. This week we’ll talk about Moab, Utah — a veritable red-rock-mountain-biking mecca! In this mini-guide, we’ll cover our favorite Moab rides.
Moab hosts some of the most unique riding and beautiful landscapes in the world. The town of Moab itself is charming and laid back, and is a great place to take your friends and family for a weekend or week.
And we don’t want to let the cat out of the bag too soon…but since you are on our email list, we want you to know first! We are hosting some events in Moab this fall! Stay tuned, we are announcing them February 7th.
Our Favorite Beginner Trails in Moab
Great Pyramid loop (4.2 miles): This is a fun beginner loop that takes you around the edge of the Dead Horse State Park peninsula. It is a great introduction to riding over red rocks and has some spectacular scenery. There are intermediate and advanced options on this trail system, so be sure to take picture of the map at the trailhead before you set out! For a fun beginner loop, take Intrepid to Great Pyramid. When you get to the Big Chief section, turn left to shortcut over to Raven Roll. Turn left at Raven Roll head back to the parking lot. Click here for the Trailforks link. If this loop is easy for you, try the Big Chief loop next time (Intrepid —> Great Pyramid —> Raven Roll —> Intrepid, 8 miles)!
Bar M Loop (8 miles): This is a relatively easy trail that winds through the foothills of Moab. It's a great option for first-time mountain bikers looking to get a taste of the terrain. (Click here for Bar M on Trailforks.)
Klondike Bluffs Beginner Loop: Klondike Bluffs is a system of trails built off the multi-use Klondike Bluffs road. This loop is great, stress-free ride for beginners. Trailforks link for entire system (not just the beginner loop).
Our Favorite Intermediate Trails in Moab:
Raptor Route links three amazing downhill trails: Eagle Eye, Hawk’s Glide, and Falcon Flow. (Please take a moment to appreciate all the alliteration.) These trails are fabulously fun, f’real. If you’re not in good shape, take a shuttle. Otherwise, pedal up Sandflats road. Click here for the Trailforks link.
Big Chief Loop. Was the Great Pyramid loop a little too easy? Try the Big Chief Loop in Dead Horse State Park! This really fun trail with incredible vistas is on the easier side of intermediate.
Klondike Bluffs Outer Loop: This trail is a bit longer, at 7 miles, but it's relatively flat and easy to navigate. It's a great option for those looking for a slightly more challenging ride. Click for the Trailforks link to the Klondike trail system.
Bartlett Wash: This takes you through a wash with beautiful red rock walls. Trailforks link.
Our Favorite Advanced Trails in Moab:
Slickrock. People travel from all over the world to ride the Slickrock trail, and it is absolutely worth the hype. There is no other trail like it. While this trail technically has an advanced-difficulty rating, many intermediate riders ride it — with a fair amount of hike-a-biking. Slickrock area on Trailforks.
The Whole Enchilada: This trail is one of the most iconic rides in teh world. It is a 27-mile point-to-point ride that starts at an elevation of 11,000 feet and ends at 4,200 feet, with a mix of steep climbs and descents, and technical sections. It's a great option for advanced riders looking for a challenging ride — definitely not for the faint of heart! Trailforks link. Parts of this ride are covered in snow during the winter, so be sure to check conditions. Pssst: book a shuttle!
Hymasa / Captain Ahab loop: This is a challenging trail that's about 6 miles long and is known for its steep climbs and technical descents. It's a great option for intermediate riders looking for a more challenging ride. Trailforks link.
Porcupine Rim: This is one of the most popular and scenic trails in Moab, it's a challenging 15-mile ride that takes you through red rock canyons and offers great views of the La Sal Mountains. This is a difficult trail with a lot of steep climbs and descents, but it's definitely worth it for the scenery. Trailforks link.
UPS. Don’t have enough time to ride the entire Porcupine Rim? You can ride a portion of it and get a really rad ride in!
The White Rim Trail: This is a 100-mile-long point-to-point trail that is considered one of the most challenging in Moab. It takes you through some of the most rugged and remote terrain in the area. Most riders do this trail in three or four days with support vehicles to carry food, water, and camping supplies. Campgrounds are spaced every few miles, but they can fill up a year in advance. Reserve early! Trailforks link.
Mag 7: This is a network of trails that offer a variety of advanced options, with a mix of steep climbs and technical descents. The Mag 7 trails are a great option for advanced riders looking for a more challenging ride. Trailforks link. This has several double-black sections and is recommended for only very advanced riders!
As always, check trail conditions before heading out and be aware of your own skill level and fitness. Additionally, It's a good idea to check with local bike shops or the Moab Visitors Center for the most up-to-date information on trail conditions and closures. If you’ve never ridden in the desert, check out our tips!
Trail Etiquette When Encountering Horses
Have you ever been cruising down a flow trail and suddenly found yourself in the path of a 1500-pound mammal? Don’t worry! Passing equestrians safely is simple if you follow some basic etiquette.
Read moreGuide to Riding a Fat Tire Snow Bike
Not sure if you want to try fat biking? Here are some of our tips.
Read moreTrail Etiquette is About Respect
Learn proper trail etiquette in order to be safe and respectful before you hit the dirt.
Read moreMountain Bike Trail Conditions
Learn more about trail conditions and when you should not be out riding.
Read moreMountain Bike Lingo
Just like lawyers, scientists, accountants, and teenagers, mountain bikers have developed their own vocabulary. Especially if you’re relatively new to mountain biking (or if you took a break for a few years), you will inevitably hear some terms that don’t make any sense. Confused about what it means to send, shralp, shred, or session? We’ve got your back! Check out our list of mountain bike lingo in 2022, curated from our team and community out of Park City, UT.
A
Alloy: Frame made from an aluminum mix. Aluminum is a common frame material that is usually less expensive than carbon.
B
Baggies: Mountain-bike-specific shorts that can be worn with or without a chamois underneath. Baggies are more durable and provide more protection against abrasions than other athletic shorts. Baggies are more loose-fitting than lycra bike shorts.
Bail: To jump off your bike in order to avoid crashing.
Bark tattoo: Abrasion from grazing against a tree at high speeds.
Berm: A banked corner designed so that riders can turn with much more traction and speed than on flat corners.
Biff: Crash or wipe out.
Bonk: Run out of energy on a ride as a result of running out of glycogen stores.
Booter: Large jump or feature.
Bottom bracket: Connects the crankset to your bike.
Brown pow: Ideal riding dirt, typically after rainfall. Also known as hero dirt. (“Pow” (powder) refers to fresh snow.)
Bunny hop: Riding technique where you bring your front tire off the ground, spring into the air, and scoop your back tire up behind you to get over features.
Burp: Release of air from your tires. This can happen when you land hard or hit a rock in a way that produces lateral forces on the tire.
C
Cadence: Pedaling speed, measured in revolutions per minute (RPM).
Carbon: Bike frame material that is generally lighter, stronger, stiffer, and more expensive than aluminum.
Chain stay: Section of a bike that connects the bottom bracket to the rear axle. The chain often slaps against this part of the frame when riding through rough sections of a trail.
Chain suck: This occurs when your bike chain gets stuck on the chainring —usually during a downshift.
Chain tattoo: Greasy chain stain left on your leg after coming into contact with your chain.
Chamois: A pad that cushions your groin area from the bike saddle. Chamois is pronounced “shammy,” and should be worn directly against your skin (no underwear!). A chamois can be worn with or without baggies.
Chatter: Sounds and vibrations heard or felt while riding that come from the frame, loose bolts, or other mechanical issues that need to be adjusted.
Clam slam: A painful occurrence where female genitalia meets the top tube of a bike with a significant amount of force. We rate this injury 0/10; don’t recommend to friends.
Clean: Ride through a section of a route without crashing, stopping, or dabbing.
Clipless pedals: - Pedals that clip into the bottom of specific mountain bike shoes. (This is a confusing term since riders who use clipless pedals are, in fact, clipped in. The term derives from older “clip” systems where riders slid their feet into basket-like cages.)
Crank: Lever that connects the pedals to the spindle. “Crank” can also be used to describe pedaling especially hard.
D
Dab: Briefly take your foot off your pedal and touch the ground with one of your feet—usually to help get through a technical section.
Day wrecker: An event such as a crash or mechanical issue that ruins your ride.
Derailleur: Bike component that shifts your bike chain to different cogs for more or less resistance. Most modern mountain bikes have only a rear derailleur; however, some bikes have both front and rear derailleurs.
Dialed: A bike that has been meticulously adjusted (“dialed” or “dialed in”) for your body dimensions and riding style. Can also refer to seemingly effortless and skillful riding.
Double track: Dirt path that is wide enough for two riders to ride side-by-side. Double-track paths are often service roads or other paths that may be shared with motorized, off-road vehicles.
Downshift: Shift down (to a lower gear).
Drop: Feature on a trail with a sudden elevation change that forces you to drop down. Can be natural (rock or lip) or human-made.
Dropper: A type of seat post that allows riders to quickly raise and lower their seat height using a lever on the handlebar.
Drive train: The components that “drive” your bike—cranks, chainrings, chain, cassette, and derailleur.
Dualie: Full-suspension (also called dual suspension) mountain bike.
E
Endo: Crash where the rider goes over their handlebars. (Can also refer to a purposeful movement where you balance on your front wheel)
Enduro bike: A bike designed to go very fast on steep, technical downhill sections. They typically have a longer wheelbase and more travel.
Enduro race: A race with multiple uphill and downhill stages. Riders must complete the uphill portions within a given time limit to remain eligible; however, only the downhill times contribute to race results.
F
Face slappers: Trees or shrubbery along an overgrown trail that hit you on the face as you ride by them.
Fattie: Bike with wide tires (“fat” tires); often used for snow riding.
Feather brakes: Technique where you gently apply enough pressure on your brake levers to control your speed.
Fire road: A graded, dirt road that is usually used for service or emergency vehicles. Fire roads are often used to gain access to higher, alpine trails or downhill sections.
Flat corner: A turn in a trail that is flat instead of banked.
Flow: A nirvana-like feeling that occurs when you link several features or sections of downhill trail seamlessly.
Fore and aft movement: A bike-body separation movement where you move frontward (fore) and backward (aft) over your bike while in a standing or ready position. This can also refer to moving your saddle forward or backward.
Fork: The two blades and crown that form a fork and hold your front wheel onto your bike. Most modern mountain bike forks include shock-absorbing legs that help absorb bumps and drops.
Front triangle: The top tube, down tube, and seat tube.
Front-wheel lift: A bike technique where you lift your front tire off the ground to either get over a feature or up onto a lip.
Full squish: Dual-suspension (full-suspension) bike where both front and rear shocks help absorb bumps and drops along the trail to give you a smoother ride.
G
Gap: A jump in which there is a space (gap) between the takeoff and landing.
Geometry: The angular configuration of a mountain bike frame. The most important geometry measurements of a bike are the angles between the top tube, down tube, head tube, and seat tube.
Gnarly: Difficult, highly technical, and/or dangerous (usually referring to a section of a trail).
Granny gear: The gear that has the least resistance and is, therefore, the easiest in which to pedal—used to ascend steep uphills.
H
Half shell: typical mtb or road helmet (not a full face helmet)
Head tube: The tube that connects the front wheel fork to the handlebars.
Hero dirt: Slightly damp, tacky soil that maintains perfect traction for tires. It doesn’t stick to tires, but provides just the right amount of grip. Hero dirt usually occurs after a rainstorm, and only lasts a day or two after the trail reopens.
Hike-a-bike: A ride on which you have to walk your bike during some sections of the trail. You may need to hike-a-bike up steep sections, over highly technical or dangerous sections, or after you’ve had an unfixable mechanical.
Huck: To go off a large jump without proper regard for consequences
K
Kicker: A jump with a steep take-off. Alternatively, to “kick” or “boot” in the air.
L
LBS: Local Bike Shop
Lid: Helmet.
Line: Particular path through a technical section of trail. Some lines are easier than others.
Loam: A special kind of dirt that is soft and moist. True loam has approximately equal proportions of silt, sand, and clay. Loam is common in the Pacific Northwest and is a pleasure to ride on.
Loose: Describes riding surfaces with loose gravel, dirt, or scree. Loose surfaces provide less traction than packed soil and are generally more difficult to ride. “Loose” also can refer to riding slightly out of control.
M
Manual: A maneuver in which a person rides with their front wheel off the ground without pedaling.
Mechanical: A problem with a bike such as a flat tire, broken chain, or bent hanger.
Moondust: Excessively dry dirt that forms a top layer on trails during very dry conditions. Moon dust can be deep, loose, and tricky to ride. Moondust conditions generally expose rocks and roots that are covered with firm soil at other times.
Mullet: A bike that runs a 29-inch wheel up front and a 27.5-inch wheel in the back. These are designed to roll over features and climb well (29-inch wheel) as well as be nimble and good at cornering (27.5-inch wheel).
N
Northshore: Wooden boardwalks that are raised above the ground. This term was popularized in Vancouver, where the style of riding is popular. Northshore features are often found at bike parks.
O
Obstacle riding: Trail features like rocks, roots, logs etc. that riders maneuver over/through.
OTB: A crash where the rider goes over the bar (handlebar).
Overcook: To approach a trail feature, turn, or jump with too much speed.
P
Pinch flat: A flat tire that occurs when the tube gets pinched between the rim and the tire. This is also known as a “snakebite.” These are less rare now that most mountain bikers run tubeless tires.
Pedal strike: An occurrence where a pedal hits a rock, root, or hump of a roller. Pedal strikes can cause riders to crash and or become familiar with the dreaded “clam slam” (see above).
PBJ: Refers to pumps, berms, and jumps. A PBJ usually refers to sections of trail that combine all three features.
PMBIA: Professional Mountain Bike Instructors Association—the organization through which our coaches are certified!
PNW: Pacific Northwest
Presta valve: A type of valve found on the majority of modern mountain bike wheels. Presta valves are longer and narrower than Shrader valves, and are made of an outer valve stem (the place where attach your pump to fill your tire with air) and an inner body. The stem is held to the wheel with a lock nut.
PSI: Pounds per square inch—a metric used for the air pressure in your tire. Tubeless setups can run lower pressure than tubes or road bikes. Check out our article on tubeless tire pressure.
PR: Personal record on a given trail or segment, as measured by your stopwatch and notebook or apps like Strava.
Pump: A technique you can use to propel your bike forward without pedaling. Pump tracks have a series of rollers and berms, and are designed to ride with minimal pedaling. Pumping is executed by bending and extending your arms in succession to move the bike forward. Try it!
Q
QOM / KOM: Queen of the Mountain / King of the Mountain. This is a Strava-specific award for earning the fastest time on a given trail or segment.
Quiver killer: An idealized, (perhaps fictional) all-purpose, holy-grail bike that can expertly handle a wide variety of terrain from steep uphills to rolling cross-country to gnarly downhills.
R
Rail: To corner with so much precision and control that it’s as though you are riding a rail.
Ratchet: A technique where the rider repeatedly half-pedals forward and backward instead of fully rotating the pedal in order to avoid pedal strikes—also known as the half-pedal stroke. This technique can be used to climb through or over rocky sections or up steep switchbacks. Learn how to ratchet here.
Reach: The horizontal distance between the imaginary vertical line that runs through the bottom bracket to the center of the head tube. This measurement is one of the most important used to determine the fit of a bike.
Rear triangle: The frame triangle formed by the chain stay, seat stay, and seat tube.
Rear wheel lift: A technique where only the rear wheel is lifted—usually to get over a feature.
Rigid: A bike with no shock absorbers.
Rock garden: A section of a trail where several large and/or small rocks are concentrated.
Rock roll: a large boulder or rock face that can be ridden.
Roller: A small hump/hill (or series of small hills) in the trail that can be ridden by pumping. Rollers are best ridden by keeping your wheels on the ground and using your arm movements (extending and straightening) to keep your head at the same elevation.
Roost: Dirt or dust that is kicked up by the bike behind the rider.
Rowdy: Rough or technical riding.
S
Sag: Refers to the distance shocks move under the weight of the rider. Sag should be adjusted properly to make sure the shocks are neither too soft nor too stiff.
Shrader valve: a pneumatic tire valve used on motor vehicles and some mountain bike tires. Shrader valves are shorter and thicker than Presta valves.
Send it: To hit a jump, feature, or trail section confidently and/or with style. To excel on the trail.
Session: To repeatedly practice a section of trail or feature.
Singletrack: A narrow trail with only enough room to ride single file. Singletrack is considered the quintessential path for mountain biking.
Shralp: To ride aggressively.
Shred: To ride aggressively.
Shuttle: A ride in which you and your bike are dropped off at a trailhead. Shuttles are often used to avoid climbing or on trails where the beginning and end are not the same.
Skinnies: Narrow, man-made wooden features where you can practice balance and vision techniques.
Slickrock: Sandstone trails that are often marked with painted lines or cairns. Common in Moab, St. George, and Sedona. There is a trail proper called Slickrock in Moab, Utah.
Standover height: The distance between your crotch and the top tube of your bike.
Steez: An amalgamation of the words “stylish” and “ease” — impressive riding that appears effortless.
Stoppie: A technique where the back wheel is lifted by abruptly braking, and the front wheel is ridden briefly by decreasing brake pressure. Also called an endo (but you don’t crash).
Strava: A popular GPS tracking application for activities where you can track your rides and share them with your friends.
Switchbacks: Tight turns that zigzag up and down mountains. Switchbacks allow you to increase elevation more gradually than riding straight up a face.
T
Tabletop: A jump with a flat top between the takeoff and landing. Tabletops are more forgiving than jumps with gaps.
Taco: Refers to a wheel that gets bent into the shape of a taco during a crash. (Definitely a day wrecker!)
Track stand: A technique used by riders to maintain balance while stopped (or barely moving) without stepping off the bike.
Trail dog: A dog that comes along on mountain bike rides!
Trailforks: A popular trail and map application for mountain bikers to find new trails, access maps, find trail-condition updates, and track rides.
Travel: Distance (in mm) a suspension system can move. The greater the travel, the more your shocks will absorb.
Tree gate: A feature where two or more trees on both sides of the trail allow only a narrow passage.
TTF: Technical trail feature.
Tubeless tires: A system used with most modern mountain bikes in which the tires have no internal tubes.
W
Wallride: A feature (usually man-made) that is built at such a steep angle that it feels like a wall to the rider.
Washout: A crash where your bike slides sideways underneath you after losing traction while riding.
Wheelie: A technique in which a rider lifts their front wheel off the ground and rides while pedaling.
Whip: An advanced technique where a rider pushes their bike sideways while in the air.
Y
Yardsale: A crash so epic that you, your bike, and your gear scatter in various directions.
*1x: Denotes that there is one front chain ring; pronounced “one by” and followed by the number of rear chain rings. Example: 1x11 or 1x12.
Mountain Biking in The Dark (Night Riding)
5 tips for mountain biking at night.
Read moreErica's Western Canadian Mountain Bike Trail and Play Recommendations
Welcome to my guide for riding in western Canada! I am not an expert, but I certainly had a life-changing trip traveling through the Canadian southwest this summer. Throughout my years of being in the mountain biking world, I have made connections to people in every single town that I have visited. Those friends gave my family and me recommendations that made our short time in the Canadian Rockies incredibly enjoyable.
My overall take:
1-The Canadian Rockies are so much more scenic than the lower Rockies - Sorry Colorado!
2-The entire drive from Fernie-Canmore-Revelstoke-Whistler-Vancouver is stunning.
3-The food is great everywhere - we didn’t have a meal we didn’t like.
4-There are not many people (except Banff and Whistler)
5-A mountain bike with a dropper is a must, all of the riding is much steeper than my hometown of Park City.
6-130 mm travel isn’t quite enough - 160mm with a slack head angle would make riding much more enjoyable
7-Canada trail ratings are very different from Utah’s. A blue trail in Canada can be as hard as our black trails. Their black trails are like our double black trails and so much steeper than anything we have in our mountains.
8-Canada is similar to New Zealand and Brevard, North Carolina: they build great downhill trails and don’t worry so much about the climbing trails. A lot of the uphill trails are just steep dirt roads. Park City is really unique with it’s dedication to building nice single track to climb.
These towns are listed by order of our visit, which was approximately east to west.
Fernie:
Breakfast-Big Bang Bagels-freshest bagels in Canada. I am still letting a few sesame seeds linger in my fanny pack as a reminder of how delicious they were.
Coffee- Rooftop Coffee Roasters-they have fresh Beignets!
Dinner - Nevados - excellent, higher-end Mexican. Great service and atmosphere.
Stay-Best Western Fernie Lodge
Ride #1 - Montane Blue Trail network and be sure to hit the trail named Uprooted
Ride #2-Lazy Lizard to Snow Lodge, Stove Trail and Dem Bones
Hike-Castle Rock
Overall opinion of Fernie: loved the relaxed vibe and views. It’s like Park City 30 years ago and Durango 20 years ago. Enough cute shops and restaurants to make it interesting, but not too many tourists. This is high on our list for revisiting winter and summer.
Kimberly:
Food- The only restaurant we visited was the Bean Tree Cafe
Stay-The Larix: recently remodeled with mountain chic design, great outdoor seating.
Ride and / or drive out to the Bootleg Trails. Bring a small grill for making dinner after you ride. There is a fire pit and bathrooms there. You might need bug spray, depending on the time of year. You need to shuttle to get to the best trails at Bootleg. The most “fun” one is Snowmexican. The views from the top are stunning.
You can shuttle half way up and hit Nimby. These trails are typically ridden with a full face helmet and knee pads. A slacked out bike with 160mm travel would be really fun on these trails (and most of the trails in western Canada). Find my IG post about these trails here.
You can climb from the parking lot of bootleg on Unicorn Hunting, but it only takes you 3/4 of the way up. These trails were made for descending, not so much for climbing.
There are also trails you can pedal to from town. We heard that Magic Line is fun.
Our friend that makes the Women in the Mountains jerseys (Kazoom cycling) lives there and showed us the trails. If you can ride double black diamond trails in Park City, I will connect you with him when you visit. He’ll show you the gnarliest trails!
Overall opinion of Kimberly-quiet town, basically no tourists, with a few cute shops in the 2 block downtown area. Nice hotel. We will visit again.
Canmore
Breakfast-Uprising Bake Shop-you can sit outside.
Dinner-Rocky Mountain Flatbread Co & Cabeza Grande-you can sit outside.
Ice cream-Old School Bus Ice Cream (the line is always long, fun summer vibes).
Bike shop-Bicycle Cafe-you can get socks or a t-shirt with their logo (reappropriated Joy Division’s Unknown Pleasures album art - sound waves from a dying star). This is where my local friends get their bikes maintained.
Ride - easy to access the Canmore Nordic Center Trails from most places in town. Be sure to ride: EKG, The Odyssey, Long Road to Ruin, Sponge Bob. My IG post of Canmore can be found here.
Stay -Solara Resort
Overall opinion of Canmore. Lots of fun restaurants, large pedestrian-only shopping and downtown area for walking around. More tourists than Fernie, but nothing compared to the volume of tourists in Banff. We’d love to go back to ski the nordic trails, they were built for the 1988 Olympics and look like a blast.
Banff
We stayed in Canmore, but if the Rimrock Resort Hotel in Banff is available, stay there! You just have to plan in advance. The Banff Aspen Lodge also looked really nice, we had lunch at the hotel’s restaurant, White Bark, after riding.
Ride-Park next to the Tunnel Mountain Reservoir and ride a very chill loop to give you big views is the Coastline and the Tunnel Mountain Campground Loop. For really fun flow ride down Star Wars and back up Return of the Jedi. For a more challenging ride, check out Topp Notch. IG post about these rides here. We rode with our friend, the President of the PMBIA. He runs an enduro program for teens in Banff.
Lake Louise-you’ll need to book a shuttle through the Parks Canada website. You have to set up an account first, then reserve the shuttle. If there isn’t a reservation for the time you want, you can still book the shuttle, then show up early and they take people (who have reservations for that day) on first come, first serve basis. So if you want to see that lake in the morning, but don’t get a reservation until 2:00, you can still show up at 9:00 AM and wait in line to get there earlier. There were a lot of people on the shore of the Lake, but hardly any in the lake. So we rented a canoe on the spot (no reservation required) and paddled to the other end. With 2 people paddling, it took 30 minutes and we had the far end of the lake to ourselves. You can bring your own paddle boards up there as well. When you are at the far end of the lake, you are closer to the glacier and it is stunning. IG post about Lake Louise here.
Mount Norquay is another great place to visit (we missed it). You can take the gondola up and eat at the Cliffhouse Bistro.
Overall opinion of Banff-incredible scenery, looks like the photos! Gorgeous rock formations and stunning peaks all around. The town center has tons of shops and restaurants. Prepare for more tourists in Banff than other places.
Golden
We only had time to stop and say hello to our friend, the Executive Director of the PMBIA. He owns Higher Ground Sports that has a built in coffee bar. Highly recommend stopping in, it’s a great shop!
The surrounding mountains look phenomenal for riding. Kicking Horse Resort has a lot of riding options. There is also a network of trails on the opposite side of town that you can shuttle that are epic! (We will be back to ride those ones!)
Revelstoke
La Baguette-no competition, best croissant ever!
Taco Club-the place to be at dinner time-outdoor seating. Every mountain biker eats there, do it!
Mount Macpherson Trails-not a lot of vertical here, but really fun, punchy climbs through lush green forest. The scenery reminded us of New Zealand. Bug spray highly recommended.
Revelstoke Mountain Resort- is just beyond! The newly built trail: Fifty Six Twenty is rumored to be the longest flow trail ever built, running a full vertical drop of 5,620 feet. The whole time you are riding, you are also taking in the views of the Columbia River (the 4th largest watershed in North America). You load your bike with you in the gondola which is a special treat (pretty awkward)! We rode lots of laps with some trail variations and of course, ate lunch at the top that included poutine. 10/10 would return to ride 5620, over and over. It’s similar to the Park City’s Tidal Wave, but much steeper berms and 6 times longer. We couldn’t get enough!
Frisby Ridge still had snow on it in mid-July, but we heard from multiple people that it’s a must-ride. One of the recommendations we received was to ride it in the late afternoon so you are not passing lots of uphill traffic on your way down.
Boulder Mountain has trails that are nice loamy trails that you can shuttle on. Our friends from Kimberly rode there and saw a grey wolf!
Heli-biking in Revelstoke is the most cost effective in Canada. It was about half the price of heli-biking in Whistler. It was worth it just for the views on the way to the ride. Flying through glacier covered peaks in truly unbeatable. You can be dropped off on Frisby Ridge or Martha’s Creek. IG posts about the helicopter ride then mountain bike ride.
Martha’s Creek is where we saw the mama and baby bear. I highly recommend getting some education about what to do in case of a bear encounter (details in my IG post). Know the difference between a Black Bear and a Grizzly Bear and know how to handle each situation. Bug spray is necessary on these trails. This is a very steep, rooty trail.
Swim in the Columbia River- Martha Creek Provincial Park has a nice swimming beach, and you are above the dam, so there isn’t any current. It was the perfect dip after riding Martha Creek. We heard of a rope swing on the other side of the river, closer to the Boulder Mountain Trails. You’ll have to ask a local where to find it!
Stay: Fairfield Inn- recently built. Big, clean rooms. We stayed here 4 nights and never got bored of Revelstoke.
Overall opinion of Revelstoke-fun downtown area, lots of places to eat, nice variety of trails. We can’s wait to ski there.
Kamloops
We only stopped at the Fresh St. Market here. It was the nicest grocery store that we found in Canada, super cute with so many options. Kamloops has Idaho/Utah/Wyoming scenery, meaning more desert than mountains.
Whistler
Into the Mystic (lower) to Into the Mystic (upper), On the Rocks, Lord of the Squirrels. Gorgeous riding, this also felt like New Zealand. Lush greenery, steep climbing.
Whistler Bike Park; Bring your Epic Pass to walk the Skybridge for free.
The Bike Park pass is seperate from than the Epic Pass, so you’ll need to buy one.
If you are going to rent a bike, do so pretty far in advance, they are not available 1-2 days in advance.
If your bike has 140 mm or less travel, it would really be worth renting a bigger travel bike. I had a 130 mm trail bike and it was fine, but a bigger bike would be way more fun (this it true for basically every trail I rode). Also plan to wear kneed pads and a full face helmet. 95% of the riders wear a full face helmet.
Stay: Hilton Whistler Resort & Spa or an AirBnb and stay for a week or two!
Overall opinion of Whistler: biggest and arguably the best bike park in North America. The trail network is so extensive and has a huge variety of terrain. The resort center feels like Vail or any other large resort area. Lots of shops and restaurants. Quite crowded. Lift lines were 10-30 minutes long. Fun swimming holes in the valley.
If I had to sum up my Canada experience in one word it would be “WOW!” The views from the road, not just the trails, elicited “wows” from everyone in the car; huge mountain vistas, enormous green rivers, so many trees… We will be back!
How to Deal with Saddle Pain
We all know what saddle pain feels like. Here are a few effective ways to eliminate saddle pain and make your riding experience more fun!
Read moreMountain Biking with Kids
Bike moms Natalie and Carrie from Two Wheeling Tots are here to share their advice on choosing the best mountain bikes and MTB gear for kids.
Read moreFlat vs Clipless Pedals
Should you buy flat pedals or go clipless? Here’s why we’re team flat.
Read moreFront wheel lift
Learn the basics of a front-wheel lift.
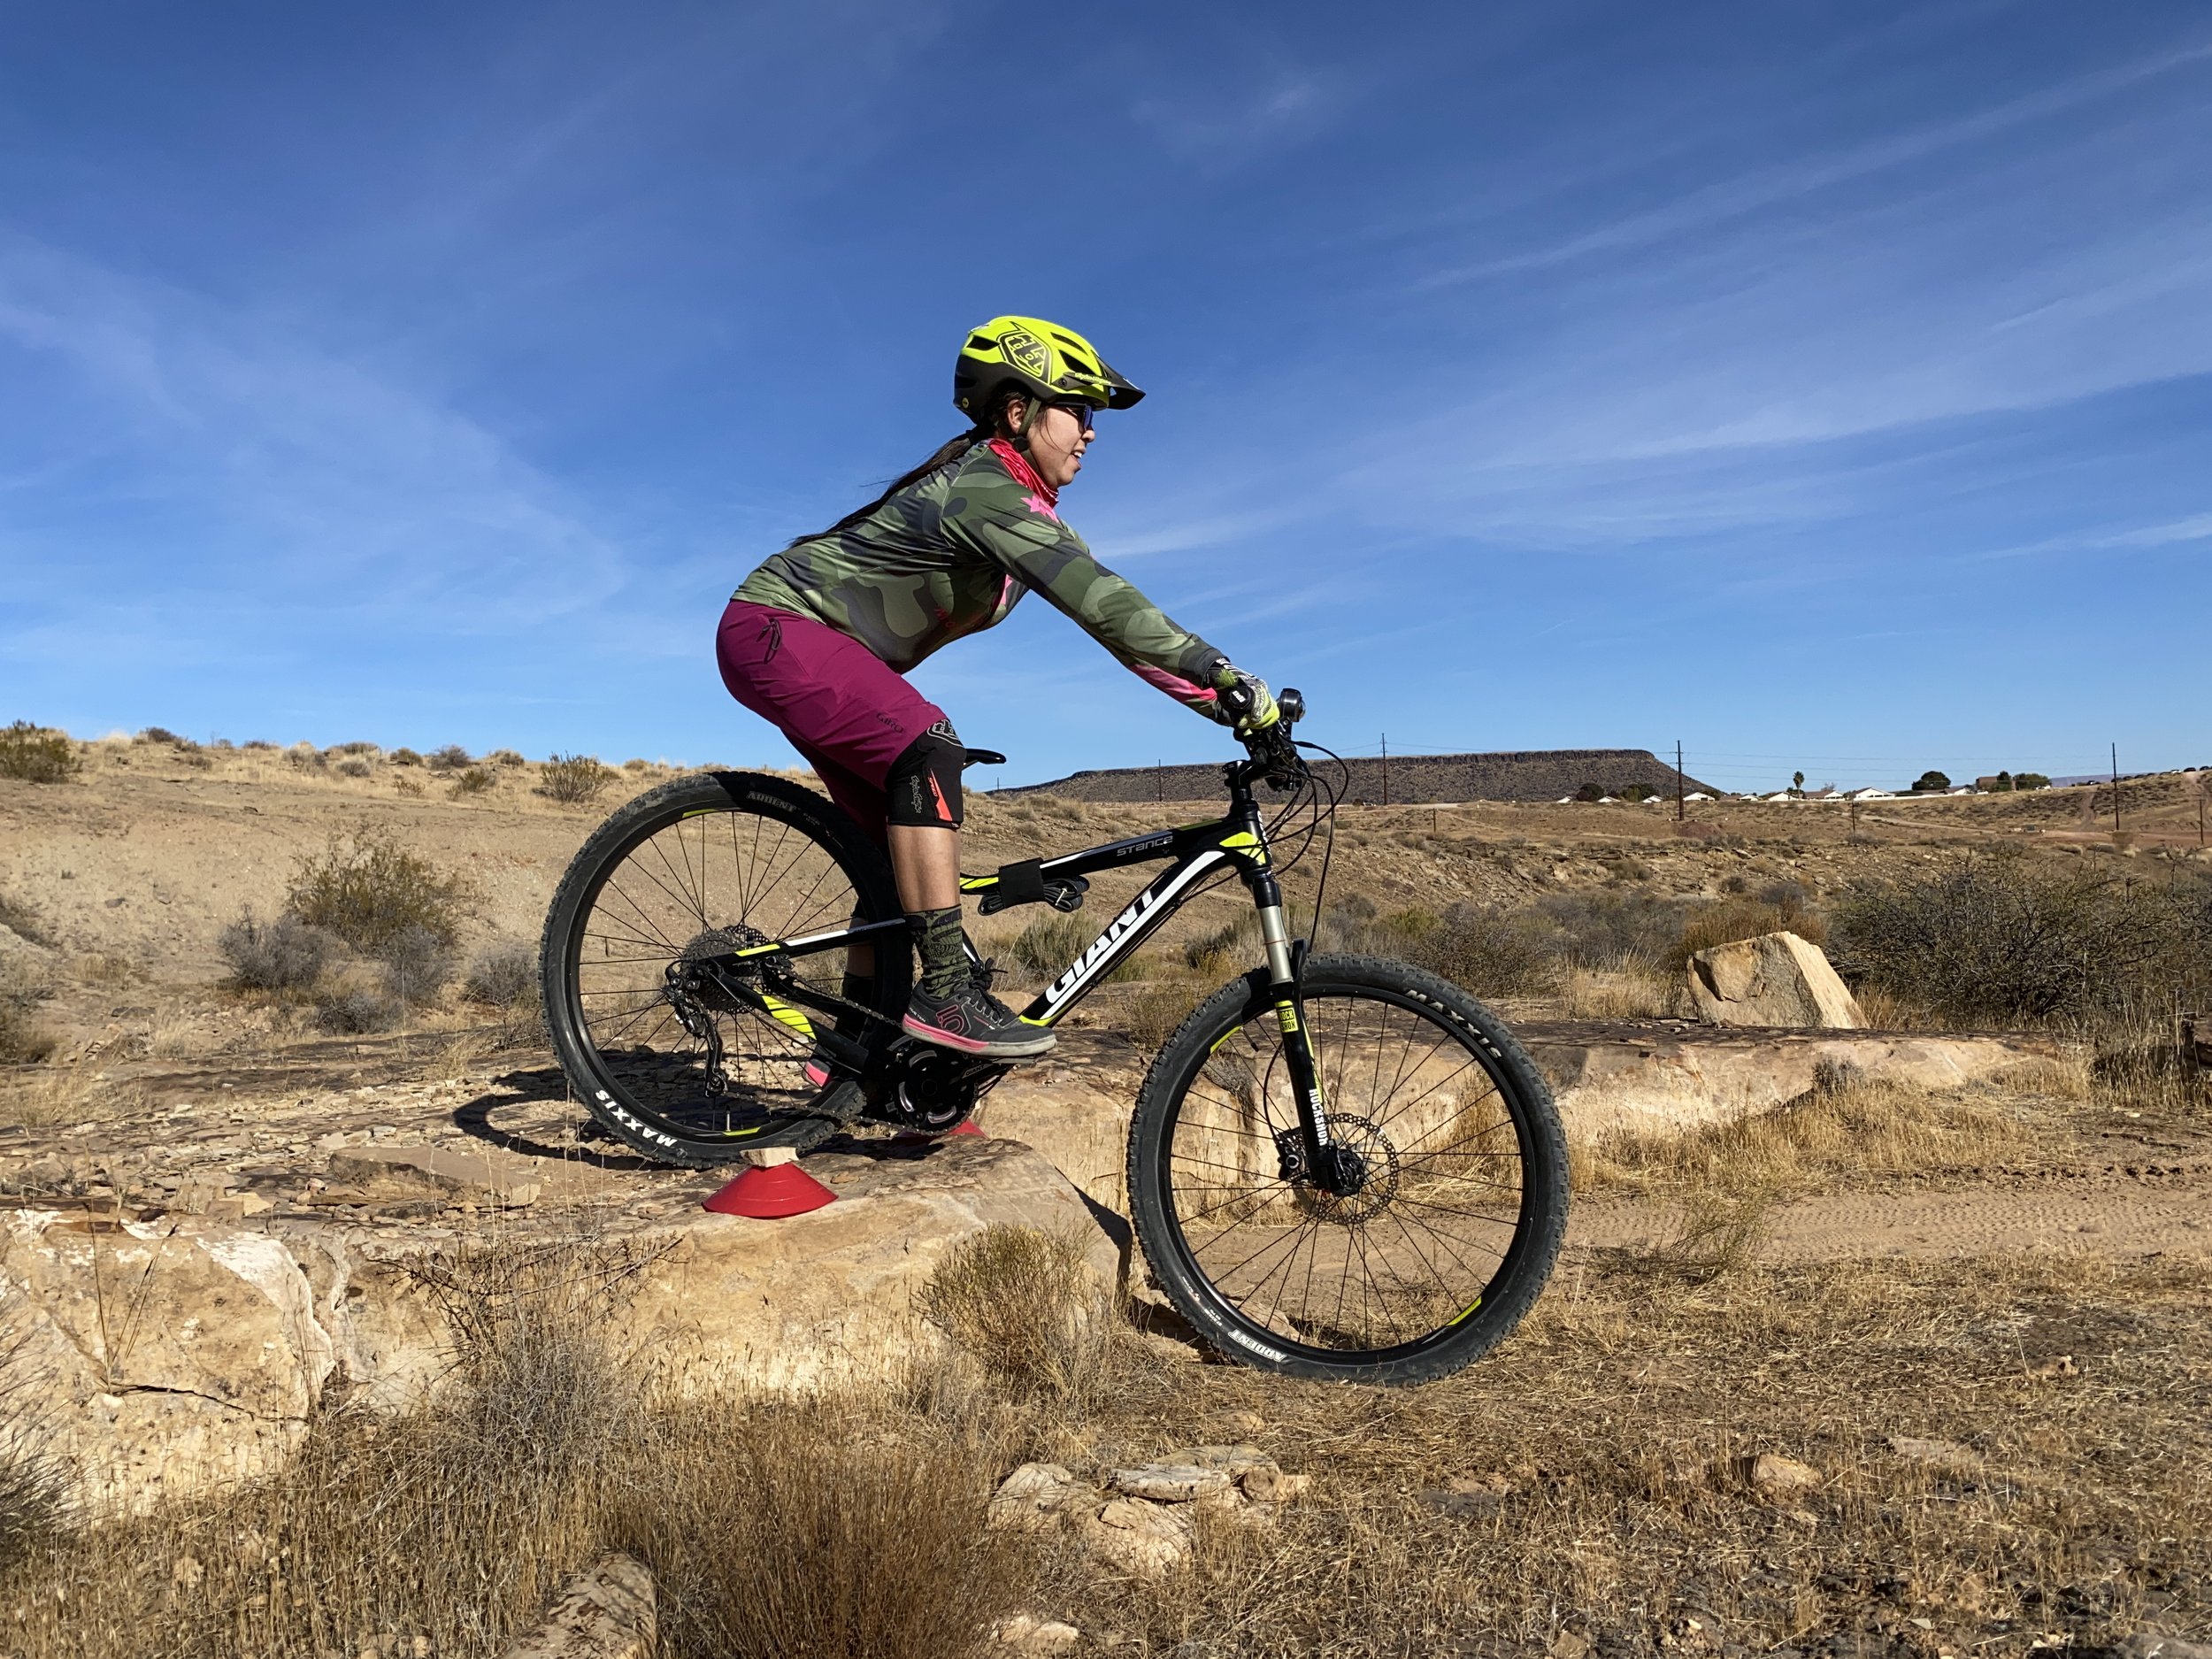
The front-wheel lift is used to get over small features in the trail. This is a foundational skill—you will use this movement to build up to other skills such as the manual. While this skill doesn't have a lot of stand-alone application on the trail, it is crucial to learn so that you can apply the principles later.
Front-Wheel Lift Technique
Load-Explode
In one quick motion, load your front shock, and allow the energy to explode.
The load component is a compression of the center of the bike.
The explode component is a compression release. Allow the bike to come up a little, but do not pull up on your handlebars.
Tips to think about
Imagine trying to make yourself weigh the most on a spring-loaded scale: you would push down in one quick motion.
Think about using a diving board. At the end of the board, you would compress once and jump, allowing the energy release from the board decompression to shoot you into the air.
Parking lot drill: front-wheel lifts
First, practice front-wheel lifts in the parking lot without any obstacles. Remember to load and explode in one quick motion.
Next, practice your timing by doing front-wheel lifts over a line in the parking lot.
When you feel ready, add a feature. Start with one small board, and then add more.
What to Bring Mountain Biking
Here's what you should carry in your riding pack to stay prepared and set yourself up for success.
Read more